
Week 2
Welcome
to the second week of "The Thread That Weaves." During this week we
will explore matte medium in more detail and use different papers and
fabrics to make backgrounds for our collages.


We will also be making a mini-book, and covering it's pages with a loose, spontaneous collage of textures and patterns.
There are two project videos and descriptions during this week.


There are two project videos and descriptions during this week.

(Photographed here are different pieces of art showing layering, not all are shown or discussed in the video).
Supplies for Week 2
*Note: Substitutions are always fine!
Matte medium
Gesso
Old paintbrush, water dish, paper towels
Water color paper, torn or cut for your surfaces,
gessoed muslin or cotten
gessoed muslin or cotten
(4 x 5, 5 x 5, 4 x 4... your choice!)
Scraps of other papers, textured, rice, napkins
(anything goes!)
Lace, burlap, netting
Photocopied images of rugs or tapestries
from different countries,
And stamps from different countries,
(You get the idea!)
Print them out to sizes that will fit into your pages.

Here is the first video:
Making Layers
In
this video I demonstrate the different ways that I use Matte Medium to
make layers. I use lace, burlap and different papers to achieve
different effects.
password: goldenthreads

And the second video:
Making Layers
continued...
In this video I demonstrate making a book within a book.
password: goldenthreads


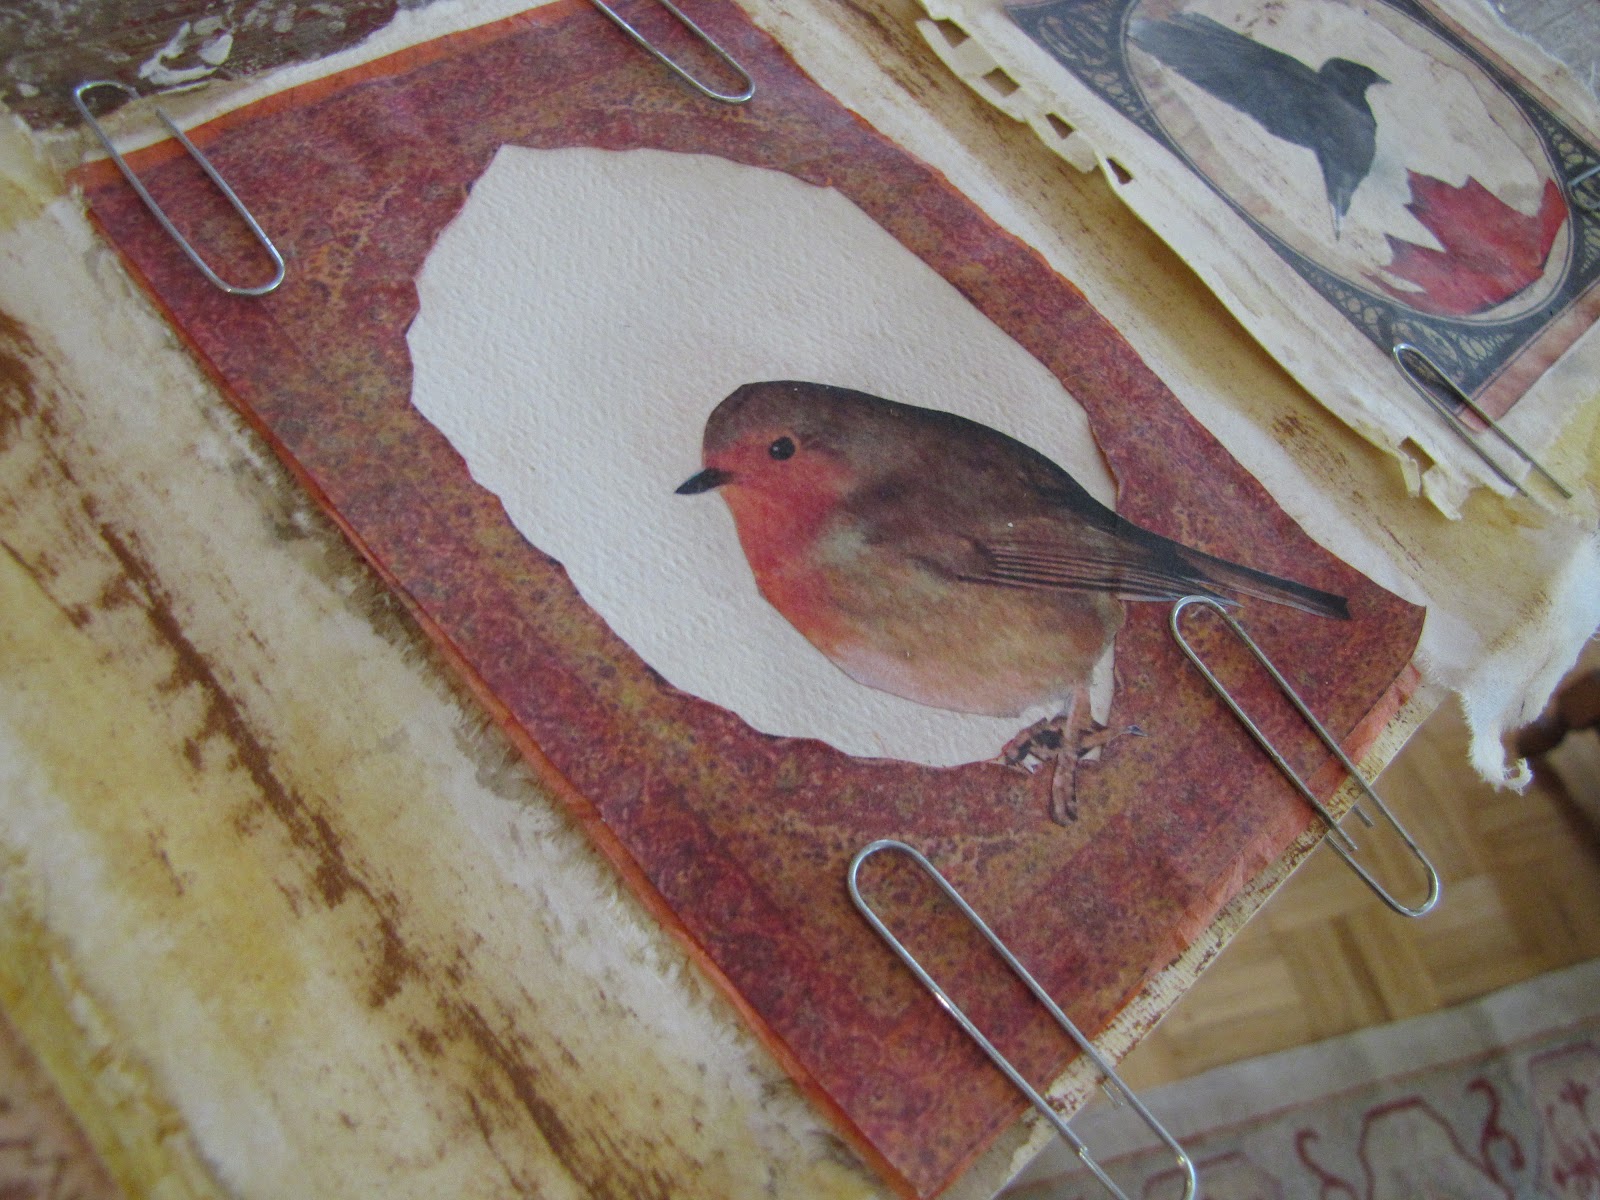
On the work table at my Camano Island workshop
pages in construction by Binky Bergstrom.
Making Layers
1.
Lay out your pre-cut or torn paper or fabric surfaces on one side of
your work table, and on the other side the things you will be attaching,
(pre-cut or torn lace, burlap, decorative paper and photo-copied images).
2.
Cover the area of your first surface with matte medium, place the lace
or textured paper over it, and then add another layer of matte medium
on top of it.
3. Dab with a paper towel. (This gives a natural look to the matte medium when it dries, without any brush strokes showing).
3. Dab with a paper towel. (This gives a natural look to the matte medium when it dries, without any brush strokes showing).
4. Use this technique with all your items. You will see more examples in the video.(Other items you could use are pieces of screens or mesh, dried or pressed plants, cheesecloth or ??)

On the work table at my Camano Island workshop pages in construction by Heidi Redfield.
5. Print out some images of rugs and stamps from the internet. There are some links above in the supply list.
If you drag the images into your photo program, (I use Iphoto for this), you can size them to fit into the pages of your book, 4 x 4, 5 x 5 or 3 x 4, your choice!6. Cut or tear out the center of the image, (see the video), so that you can use the outer part as a border.
7. Add matte medium to your background paper. Lay the image border on the paper. Cover with matte medium and dab with a paper towel. (The image might fade slightly, but this can make it look more like a painting and less like a photograph).

8. Repeat the process using different images.
You
should have several pages done that you will be using for your book.
If you can help it... don't glue them down yet, just attach them with
paper clips, (the large kind) so you can change your mind and try out
different designs. I also have something else planned before you attach
them!

pages in construction by Seth Apter

Making A Book Within A Book
During this part of Week Two you will be making a little book to go inside of your larger book. 1. Start with a piece of watercolor paper and some colored or textured rice paper all about 6inches by three inches. (I like to have my pages slightly different sizes).
2. Fold them in half, and experiment with slipping them inside of each other. Then tear or cut them so that they are uneven. (I love this look, but if you want your book to be more perfectly done, that's fine too!)
3. Fill up the pages of your little book with what ever you like, left over photo copies of rug patterns, colored paper, text... anything!

*The process continues,
tearing and cutting,
arranging and re-arranging,
putting your images on top of other images
to see what looks best to you......
to see what looks best to you......
We will be stitching and attaching the book later using a pamphlet
stitch. If you love making these little books, make two or three...

Take
a walk outside, near your home or to a nearby park. Collect five
different leaves, twigs, buds or seed pods or whatever else captures
your imagination.
Bring
them home to your worktable. Arrange them or pile them on a piece of
your own art, writing or fabric. Try different arrangements and
groupings, large to small, smallest in the center, grouped in a mandala.

Make a list of what you have collected including a brief description.

Photograph
them in different ways. Photograph them with your list. Cut up the
list and "label" each object. And then photograph that!


No comments:
Post a Comment