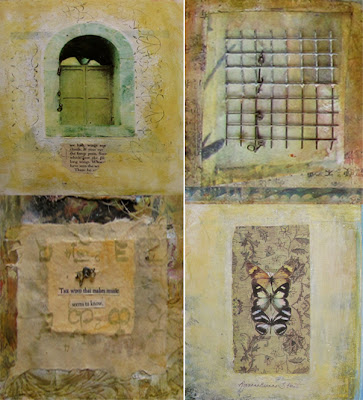
Week Three
In
the following days you will watch your themes come to life! During
this week we will work on adding collages to our background pages. We
will experiment with design and composition so that our images flow from
one to the other, with the focal point in the center panels of the back
and the front. We will also do some stitching and begin the process of
laying our pages out on to the book. If you have any questions or
suggestions please email me. And enjoy yourself!!
matt medium
water dish, old paintbrush
paper towels
photocopied images
or images from magazines
cut or torn
assorted papers
background pages
completed last week
twine or thread
large needle
scissors
found objects
objects from nature
jumbo paper clips
small brads
And the second video:
Collaging, continued...
password: goldenthreads
Here we continue working with collage, this time stitching and attaching found objects to our pages.
Projects
Part One (the first video)
1. Cut or tear some photo-copied images that go with your theme.
2.Experiment placement ideas, trying focal points in the center, off to one side or another, and on the top or bottom of your page.
2.Experiment placement ideas, trying focal points in the center, off to one side or another, and on the top or bottom of your page.
3. Using matte medium, add photo copied images to one or two of the background pages we started last week.
(Remember to put a layer underneath and over your image)
(Remember to put a layer underneath and over your image)
4. Dab excess medium off with a paper towel.
Put aside to dry.
5. Repeat these steps with images cut from a magazine,
5. Repeat these steps with images cut from a magazine,
and your own photographs.
Before you start this next part collect some objects that you would like to attach to your little book. Suggestions are a small piece of fabric or lace, twigs or feathers, a metal piece, frayed edges of paper or fabric.
Part Two (the second video)
1. Use an awl to poke holes through your layers, (try to line your holes up evenly so they look good from both sides).
2. Then start to sew your stitches to connect your objects to your pages. Leave long ends where you start and finished.
2. Then start to sew your stitches to connect your objects to your pages. Leave long ends where you start and finished.
Tie the ends of the threads together, (front or back, your choice!)
Note: There is no write or wrong way to do this.
Whatever is pleasing to your eyes
is the direction you should go.
Whether you choose small stitches or large,
These
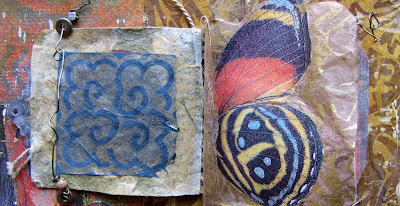
are little bundles of papers, fabrics and found objects that I stitched
together, these are for my collaborative show that I am doing with Seth
Apter in May.
3. Pick one of the background pages that you worked on last week, maybe one that is covered with fabric or lace.
4.
Collect some scraps of other fabric or paper that you are drawn to.
Cut or tear them so they are different sizes, so the bottom layers will
show when they are stacked together.
5. Arrange the papers lake a "tablet." Hold them together or paper clip them so the stay in place.
6. Poke two holes across the top (see example in video).
6. Poke two holes across the top (see example in video).
Place brads in the holes and fasten.
Stitching the Mini-book
1.
Get your mini book out. If your book isn't too stiff you can stitch it
together without pre-poking the holes. If it is too hard to get your
needle through the center fold, use an awl to make the holes first.
2. To start your "pamphlet" stitch, start from the approximate center, sewing from the outside in.
3. Make another hole about a half an inch from the top, (now you are on the outside of your book again).
4.
Make your next hole about a half of an inch from the bottom, bring
your thread towards the center and sew it through your original hole.
5. Now both your threads should be hanging from the outside center.
6. Tie and trim them so that they are the length that you want.
This little mini book is attached to a larger painting,
a self portrait that was published in Seth Apter's
"The Pulse of Mixed Media that came out 2012
You
can see from my video that it is time to start laying out your collaged
and textured pages on on the main part of your book. I laid out the
side with the spines on it, and tinted the edges a little more. I still
might make them darker but I like to do a little at a time so that all
the layers of color show through.
When you get your pages so that you are happy with how they look, paper clip them in place and take a photograph!
*Extra Ideas: adding dried or pressed flowers/leaves
with matte medium, or adding an image over a pressed leaf.
with matte medium, or adding an image over a pressed leaf.
Adding a feather by stitching or placing it inside of burlap or fabric
with a loose weave.
with a loose weave.
Make another little book, you can never have too many!
Collecting and Writing:
As
you wake up for your morning coffee or tea,
let your eyes wander around your kitchen or dining room.
Pick up three small objects that catch your eye,
each should fit into the palm of your hand.
Write what the objects mean to you on three different scraps of paper.
Tear or cut the paper and place it near the objects.
let your eyes wander around your kitchen or dining room.
Pick up three small objects that catch your eye,
each should fit into the palm of your hand.
Write what the objects mean to you on three different scraps of paper.
Tear or cut the paper and place it near the objects.
Photograph your objects and words near a window, but not in the direct sunlight.


No comments:
Post a Comment